How to build a USSD app using Africas Talking API

Photo by Yura Fresh on Unsplash
A step by step guide on how to build a USSD app
Building a USSD app using Africa's Talking API
Setup Simulator
Follow this article to setup simulator. After you have launched the simulator, go back to your sandbox dashboard and create a channel. A Channel will help us to run our implementation. The channel will constitute a Service Code and Callback URL.
A Service Code is the USSD code that we are going to type on our simulator and it will call the callback url upon hitting send. You can imagine a situation whereby someone is checking their balance. For instance they will enter *144# and hit send. The *144# is a Service Code. Upon hitting send, a callback url will be called, the url endpoint will help to carry out the needed operations which will be to determine the actual calculation of the balance and return the results.
Create a channel
Under the USSD menu in your sandbox dashboard click Create Channel
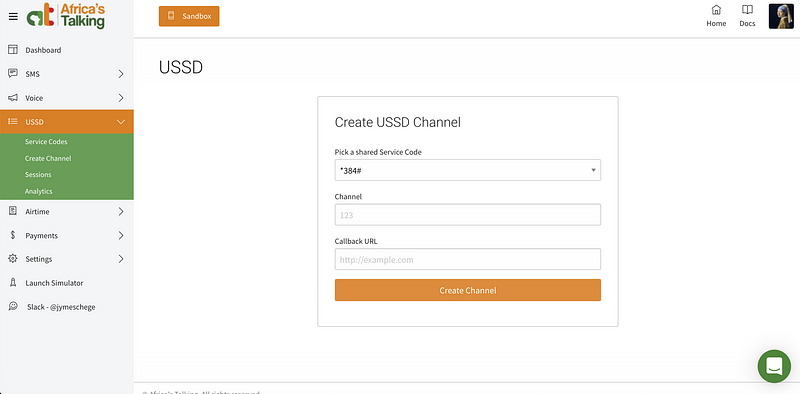 To create a channel you will need callback url. A callback url will be called
when a user sends a request using a service code.
To create a channel you will need callback url. A callback url will be called
when a user sends a request using a service code.
Create a callback url
- Head to https://dashboard.ngrok.com/user/signup and create an account or login if you have one.
- Download and unzip ngrok which will help us to access our localhost server through the internet.
- After downloading the ngrok open a terminal window and navigate to the directory where you downloaded the setup.
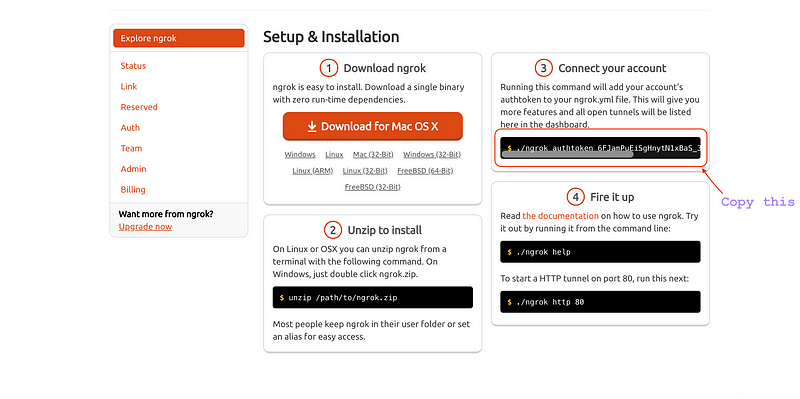
- Copy the command shown in the above screenshot and enter it in the terminal. Note: The above command should be run int the directory where you downloaded the ngrok

- Run
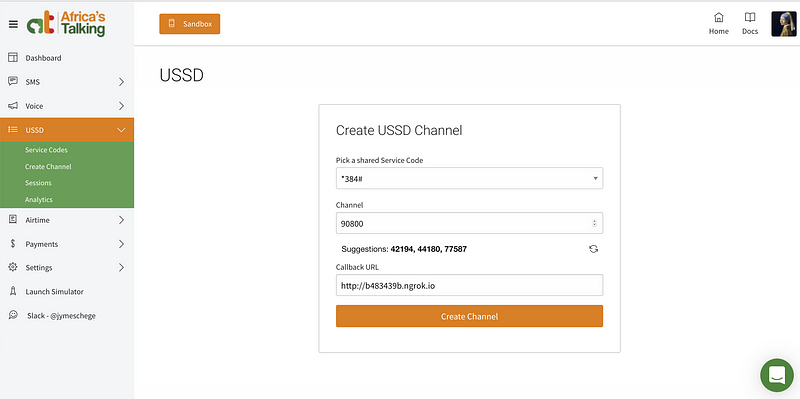
./ngrok http 3000to start a HTTP tunnel to our localhost on port 3000. You will be able to see something like shown below. - Copy the Forwarding url .For my case it is
http://b483439b.ngrok.io - Paste the link in the callback url field and input a channel of your choice
and if the channel is not available you will get suggestion as shown in the
image below
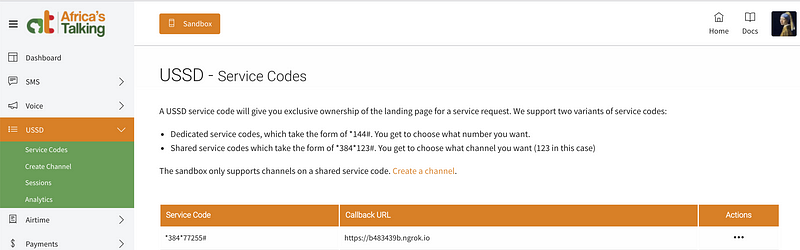
 We should have something as shown below in our USSD - Service Codes.
Now that we have a channel fully configured we can start writing code.
- Initialise a node application:
yarn init or npm init - Install express, nodemon, body-parser and africastalkingdependencies:
yarn add express nodemon africastalking body-parserornpm install express africastalking nodemon body-parser --save - In the root directory (current directory) of the app, create a file named index.js and add the following code into the file.
1const express = require('express')23const router = express.Router()45router.post('/', (req, res) => {6 // Read variables sent via POST from our SDK7 const {sessionId, serviceCode, phoneNumber, text} = req.body89 console.log('####################', req.body)10 let response = ''1112 if (text === '') {13 console.log(text)14 // This is the first request. Note how we start the response with CON15 response = `CON What would you like to check16 1. My account17 2. My phone number`18 } else if (text === '1') {19 // Business logic for first level response20 response = `CON Choose account information you want to view21 1. Account number22 2. Account balance`23 } else if (text === '2') {24 // Business logic for first level response25 // This is a terminal request. Note how we start the response with END26 response = `END Your phone number is ${phoneNumber}`27 } else if (text === '1*1') {28 // This is a second level response where the user selected 1 in the first instance29 const accountNumber = 'ACC100101'30 // This is a terminal request. Note how we start the response with END31 response = `END Your account number is ${accountNumber}`32 } else if (text === '1*2') {33 // This is a second level response where the user selected 1 in the first instance34 const balance = 'KES 10,000'35 // This is a terminal request. Note how we start the response with END36 response = `END Your balance is ${balance}`37 }3839 // Print the response onto the page so that our SDK can read it40 res.set('Content-Type: text/plain')41 res.send(response)42 // DONE!!!43})4445module.exports = router
- Create another file in the root of your project and name it
app.jsand add the following code into the file.
1const express = require('express')2const ussdRoute = require('./index')3const bodyParser = require('body-parser')45const app = express()6const PORT = process.env.PORT || 300078app.listen(PORT, () => console.log(`running on localhost:${PORT}`))910app.use(bodyParser.json())11app.use(bodyParser.urlencoded({extended: false}))1213app.use('/', ussdRoute)
- Modify your package.json file to include a script to run the app. The file should then look something like below.
1{2 "name": "ussd-app",3 "version": "1.0.0",4 "main": "index.js",5 "author": "James",6 "license": "MIT",7 "dependencies": {8 "africastalking": "^0.4.0",9 "body-parser": "^1.18.3",10 "express": "^4.16.4",11 "nodemon": "^1.18.10"12 },13 "scripts": {14 "start": "nodemon app.js"15 }16}
In your your root folder via the terminal type
yarn startornpm startto start the app.Head to the simulator and choose the USSD option.
Dial USSD - Service Code in the simulator which we generated earlier. For my case it is *384*77255#
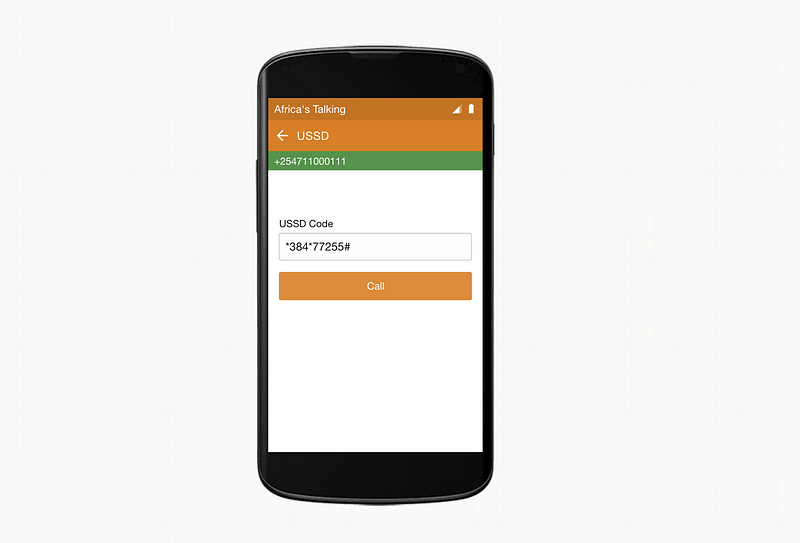
The following screenshots shows the results after dialling the USSD code.
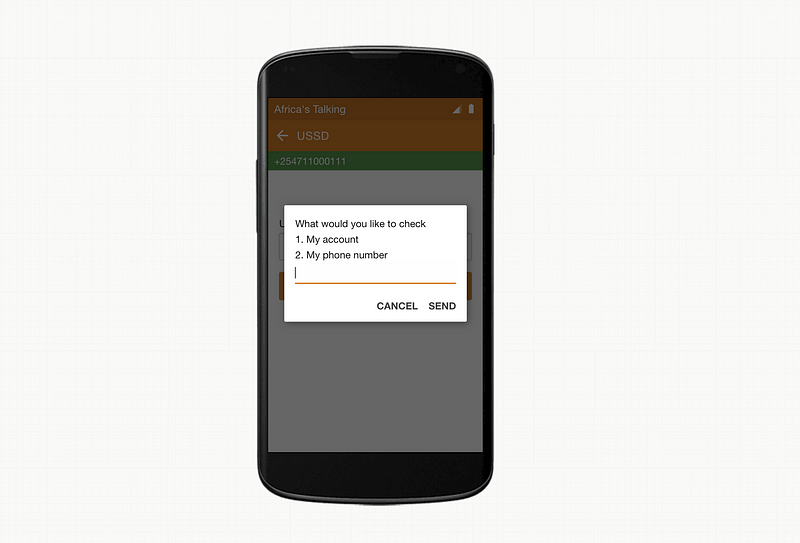
Feel free to play around with the options provided. This means that our USSD app is fully functional.